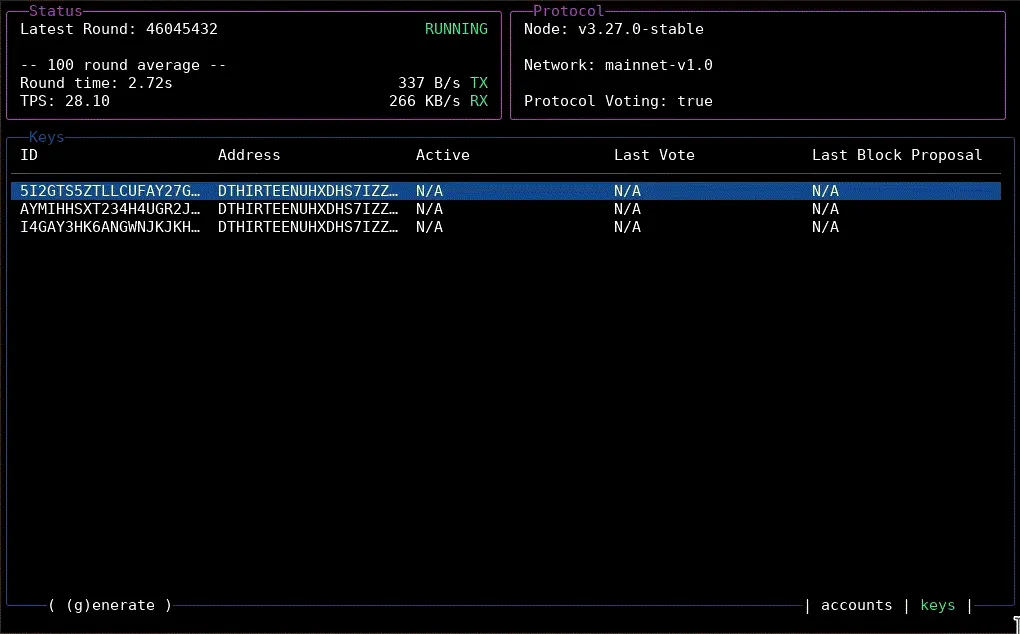
NodeKit Quick Start
Get up and running with NodeKit in minutes. This guide will walk you through installing NodeKit and setting up your first Algorand node, including generating participation keys for an account and registering them online, including enrolling in staking rewards.
NodeKit can help you with:
- Installing and configuring an Algorand node
- Syncing your node with the latest state of the network
- Managing consensus participation keys
- Monitoring your node and the network
Installing NodeKit
To get started with NodeKit, copy-paste this command in your terminal:
wget -qO- https://nodekit.run/install.sh | bashcurl -fsSL https://nodekit.run/install.sh | bashTroubleshooting: Command ‘bash’ not found
Some versions of Mac OS may not include the required bash executable that runs the installer.
If you get an error about bash not being available, please install bash on your system manually.
For Mac OS, a popular way to do this is to install Homebrew and then install bash using:
brew install bashThis will detect your operating system and download the appropriate NodeKit executable to your local directory.
It will then immediately start the bootstrap process to get your Algorand node up and running:
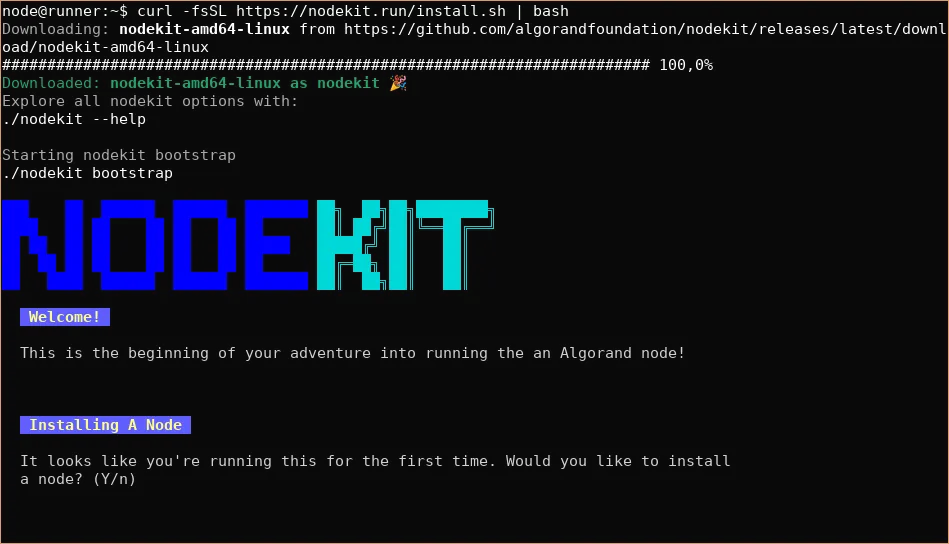
Bootstrapping the Algorand Node
How to Start the Process
The bootstrap process is automatically started after following the installation instructions above, but it can also be triggered manually by running this command:
./nodekit bootstrapPrompts: Installation and Fast-Catchup
nodekit bootstrap will check to see if there is a node already installed.
If there is none, it will ask if you want to start a node installation:
Installing A Node
It looks like you're running this for the first time. Would you like to install a node? (y/n)
It will then ask if you want to perform a “fast-catchup” with the network:
Regular sync with the network usually takes multiple days to weeks. You can optionally perform fast-catchup to sync in 30-60 minutes instead.
Would you like to preform a fast-catchup after installation? (y/n)
Fast-catchup saves a lot of time, so we recommend responding Yes.
Assuming you have responded “Yes” to the node install prompt, you will now be prompted for your user password:
WARN (You may be prompted for your password)INFO Installing Algod on LinuxINFO Installing with apt-get[sudo] password for user:Why is the installer asking for my password?
The installer will ask for your user password during the node installation process.
This is required by your operating system in order to install new software.
Installation
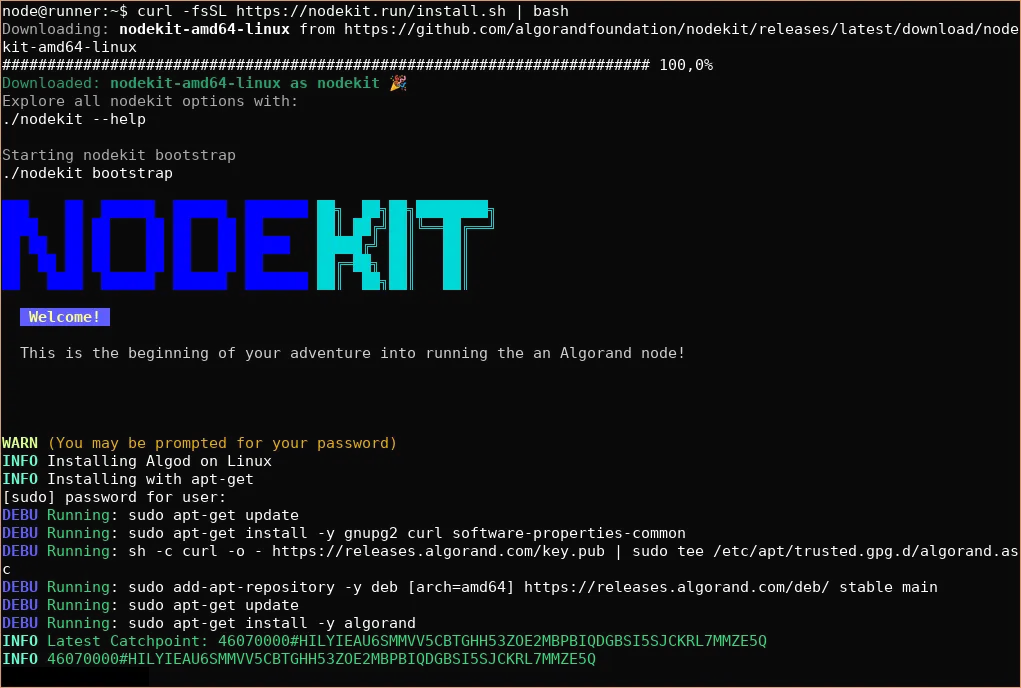
After you enter your password, you can now sit back and wait until your Algorand node is installed and syncs with the network.
The installation phase should only take a few minutes. Your terminal will look like this during the installation phase:
Fast Catchup
After installation is complete, NodeKit will automatically start the NodeKit user interface.
This will display the progress of catching up to the latest state of the Algorand network:
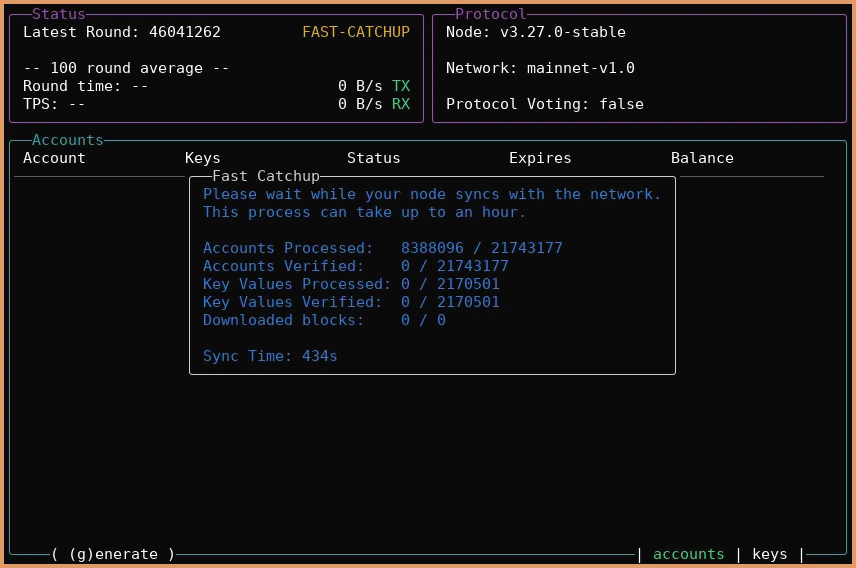
This process usually takes between 30-60 minutes, depending on your hardware and network connection.
When the process is done, the Fast Catchup status information will disappear and the yellow FAST-CATCHUP status at the top will change to a green RUNNING state.

Troubleshooting: Fast-catchup
If the fast-catchup process does not complete within 1-2 hours, check the following:
Your Hardware Meets the Requirements
Check that your node meets the hardware requirements for a participation node.
Nodekit is in FAST-CATCHUP state
The colored status at the top of Nodekit should be in a yellow FAST-CATCHUP state:

If not, exit nodekit with q and run ./nodekit catchup to start catching up. Then run ./nodekit again to enter the user interface.
After fast-catchup completes successfully, it is normal for a node to be in a SYNCING state for a few minutes:

During this the Latest Round number should be increasing rapidly.
If there is no progress for a while, or the Latest Round value is smaller than 46000000 (46 million) then you should start fast-catchup again.
Generating Participation Keys
If it is not running already, start NodeKit with this command:
./nodekitAfter your node has fully synced with the network, you will see a green RUNNING label at the top:

You will only be able to generate participation keys after your node is in a RUNNING state
Generate Participation Keys
Press the g key to start generating participation keys.
NodeKit will ask the account address that will be participating in consensus. Enter your account address and press enter.
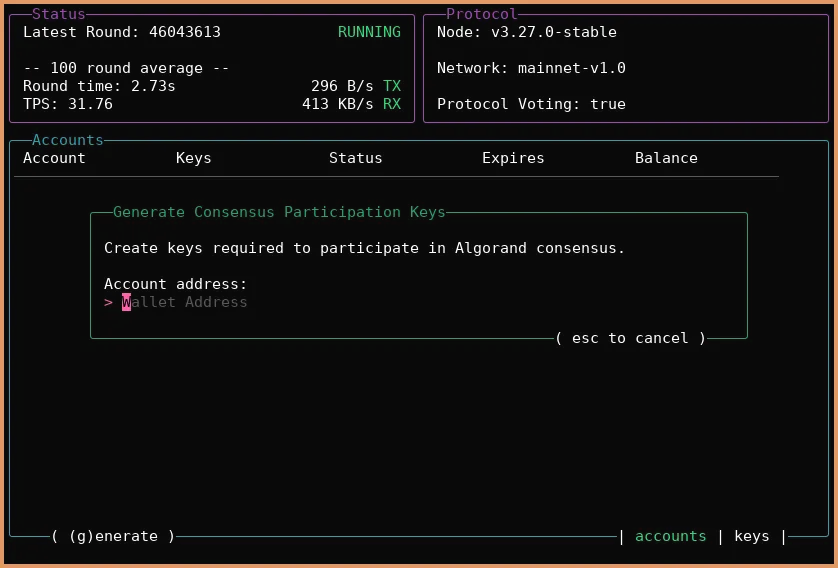
Select Participation Key Duration
NodeKit will ask the number of days that the participation keys will be valid for:
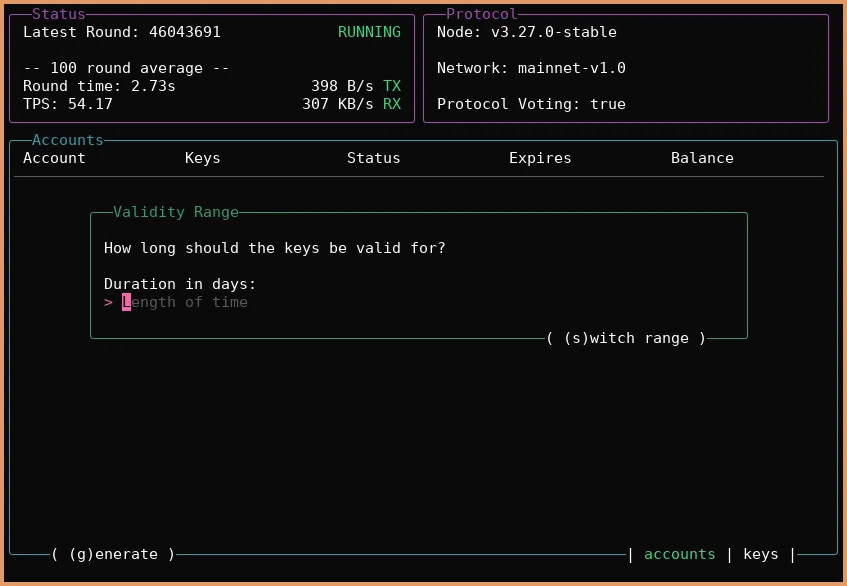
You can press the S key to cycle through duration modes in days / months / rounds.
The longer your duration, the longer the participation key generation step will take to complete.
We recommend a value between 30 and 90 days.
Key Generation
After you have selected your key duration, nodekit will instruct your node to generate participation keys.
The time required for this step will depend on your participation key duration. As an indicative wait time, a 30-day participation key should take between 4-6 minutes to generate.
Troubleshooting: Failed to get participation keys
Occasionally, Nodekit may fall out of sync with the Algorand node while waiting for the participation keys to be generated. In this case this error message will be shown:
failed to get participation keys
You can:
- wait for the participation keys to appear in the Accounts list
- try to generate a participation key again - If the key generation process is still running on the node, you will see a
Participation key generation already in progresserror

When your participation keys are ready, nodekit will display the key information as shown below.
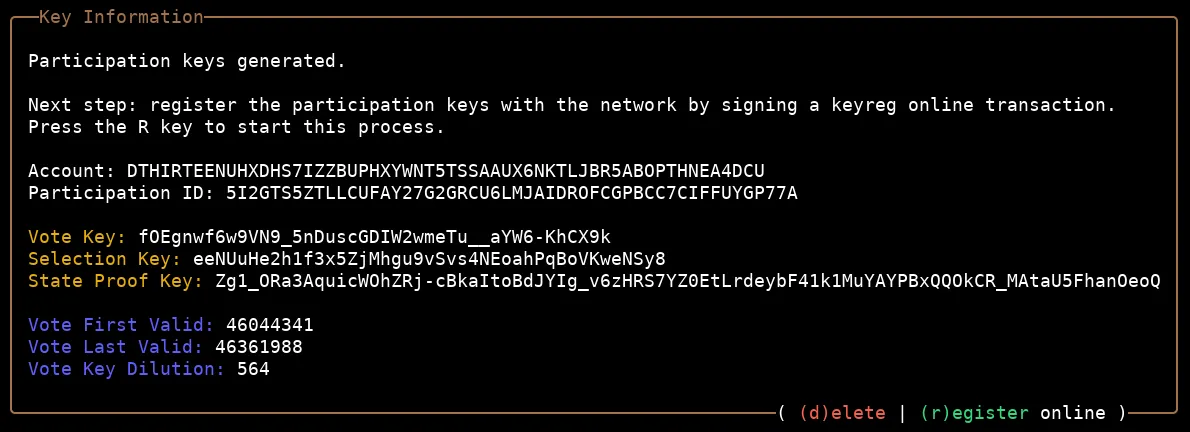
You are now one step away from participating in Algorand consensus! The next step is to register your keys online.
Registering Your Keys Online
After generating a participation key, you can press r to start registering it on the Algorand network. By default NodeKit will assume that the account should be made eligible for staking rewards, which costs a 2A fee on key registration. To opt out of this default logic and have accounts not be enrolled in staking rewards, launch NodeKit with ./nodekit -n', including the -n` flag.
You can also start this flow by pressing r on the key information screen shown below.

After you press r, you will see a link that you can follow to sign your key registration transaction:
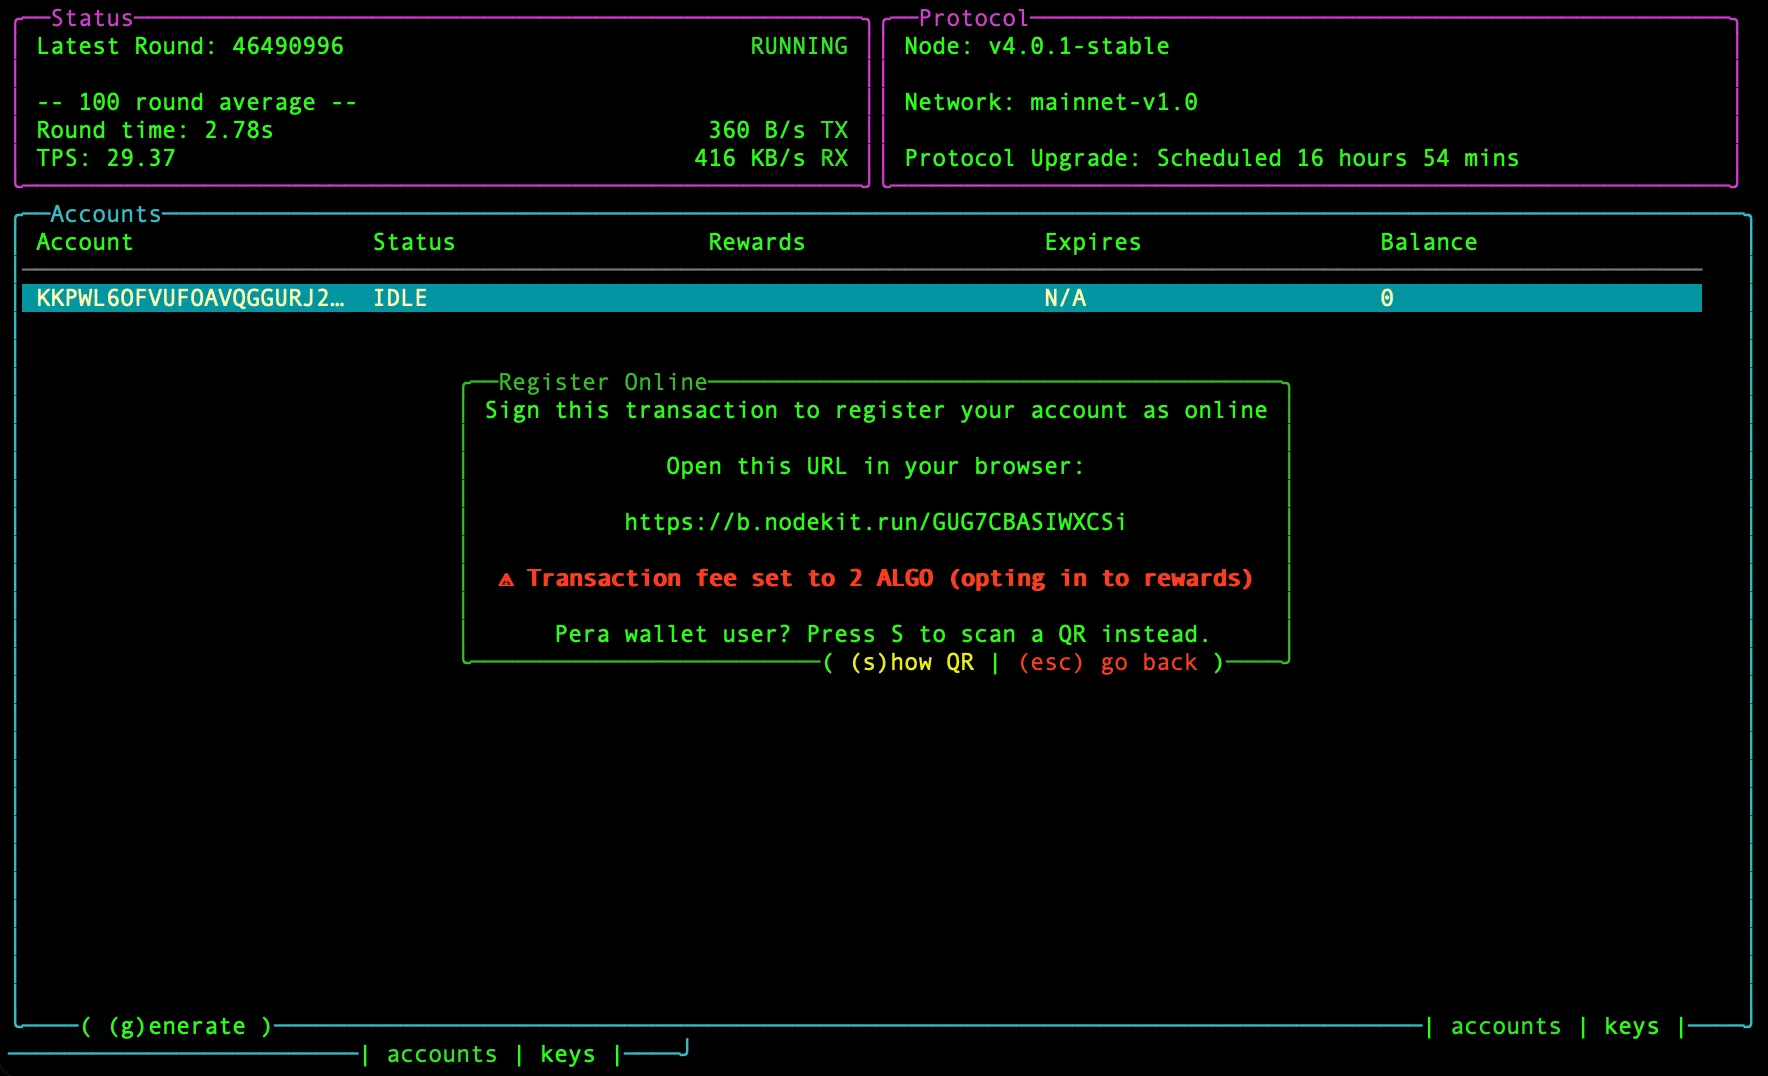
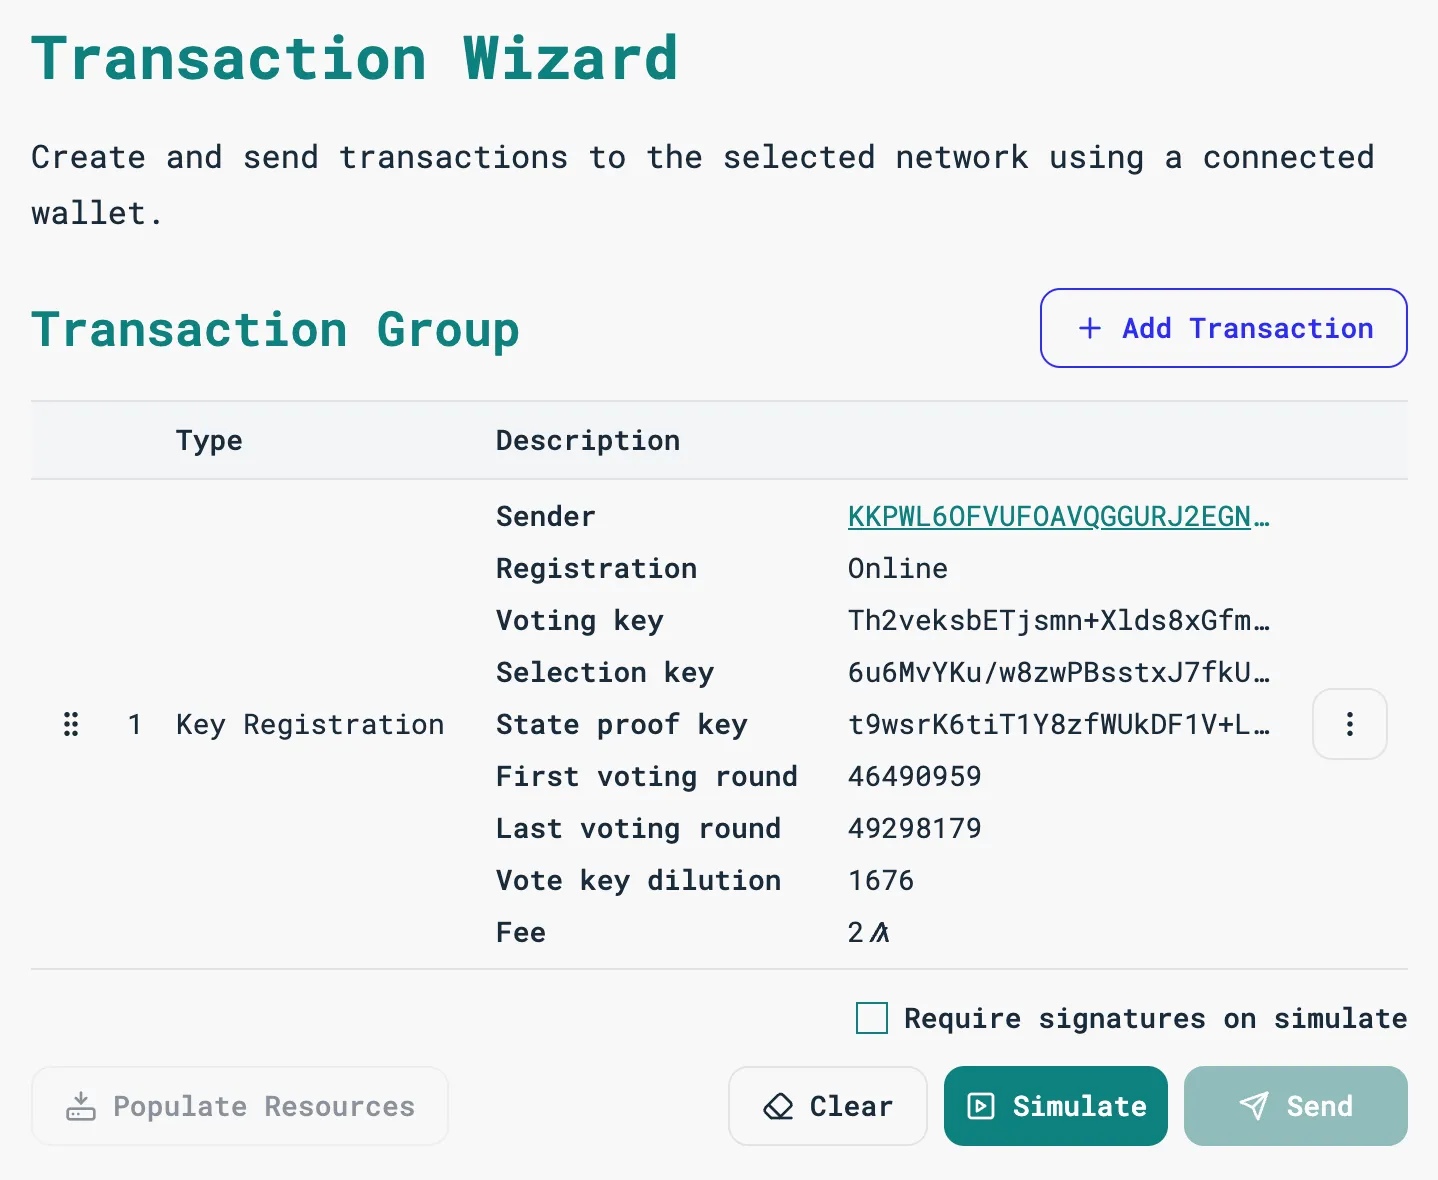
On most terminals, you can hold down ctrl or cmd and click the link to open it in your default browser. If this does not work, copy the link and paste it into your browser. You will be taken to the Lora Transaction Wizard, where you should see the key information pre-filled:
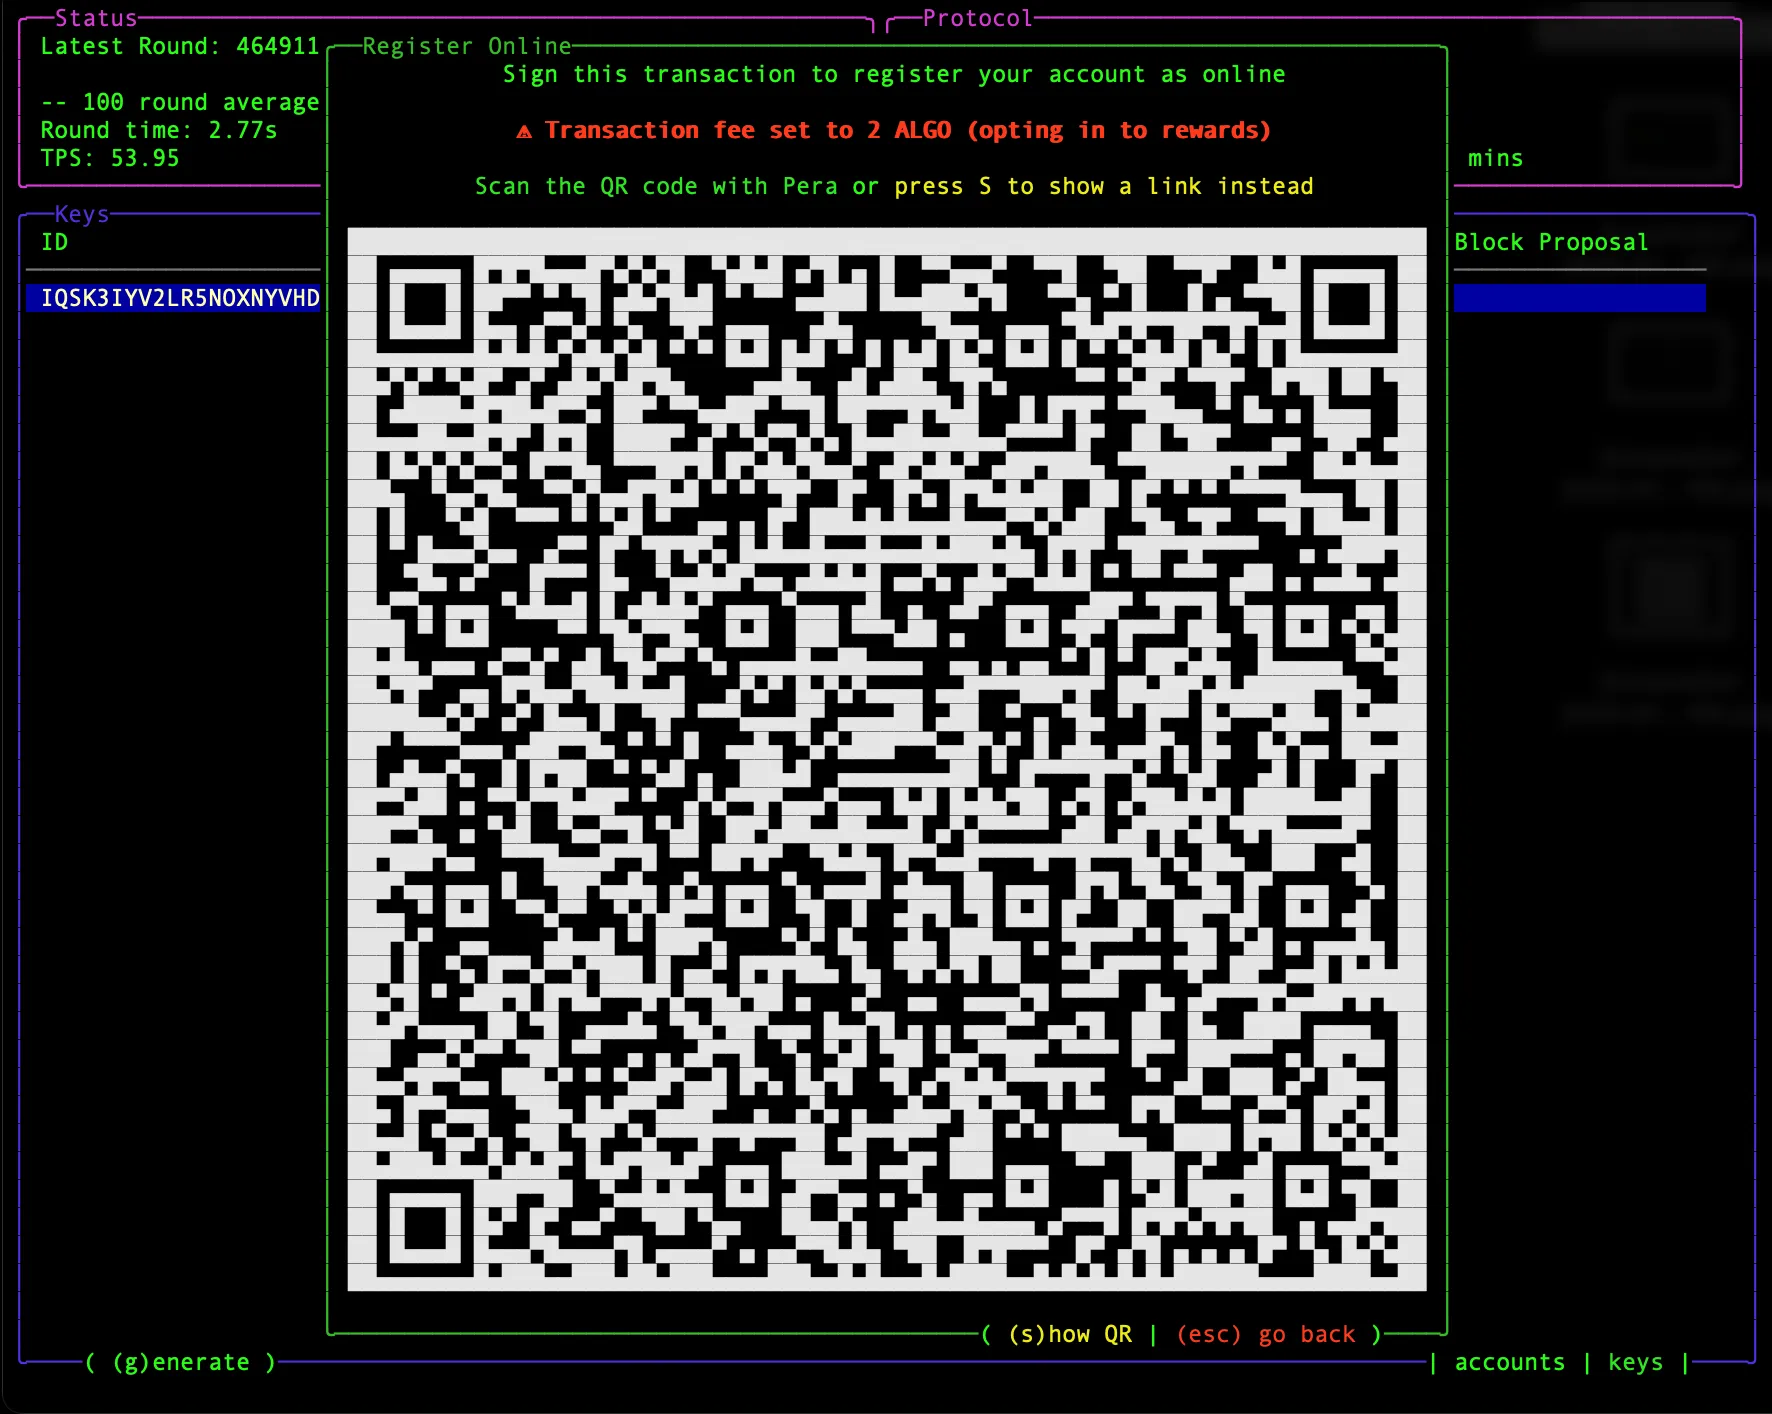
Alternatively, you can press s when the link is presented to show a QR code that contains the key registration transaction that can be scanned to open the transaction in Pera wallet ready to be signed and sent.
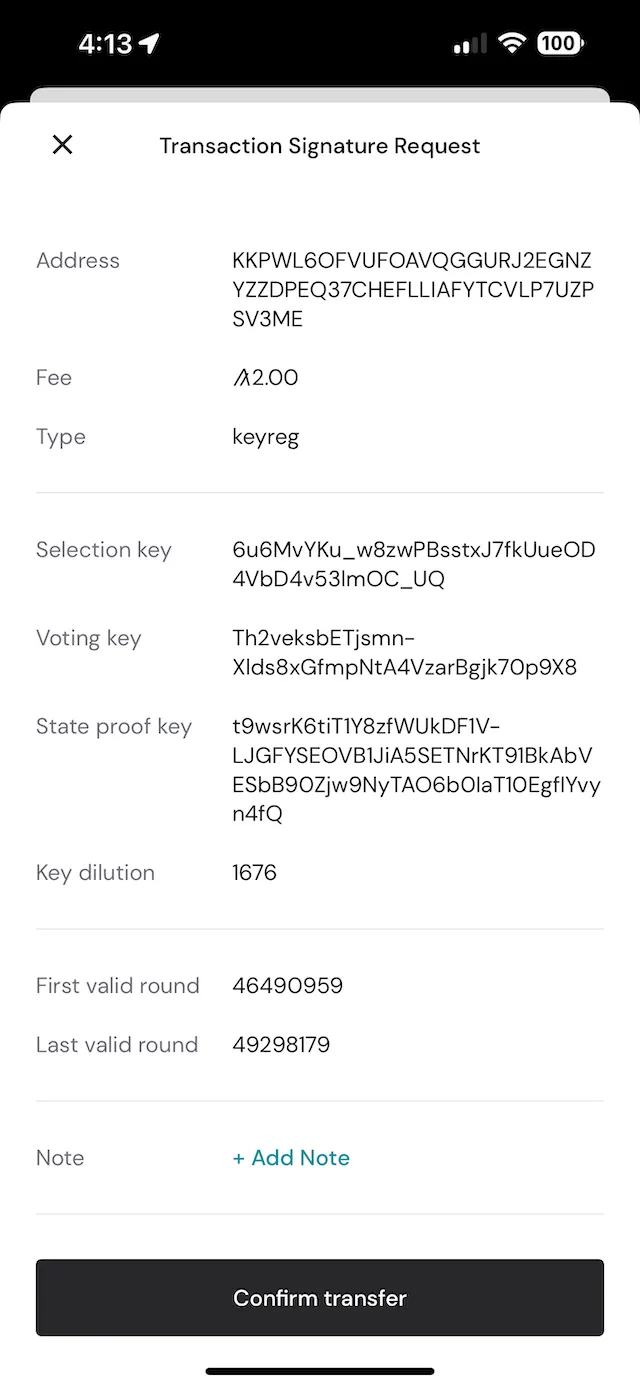
After scanning with Pera, you will see the transaction details in your wallet.
- Sign the transaction
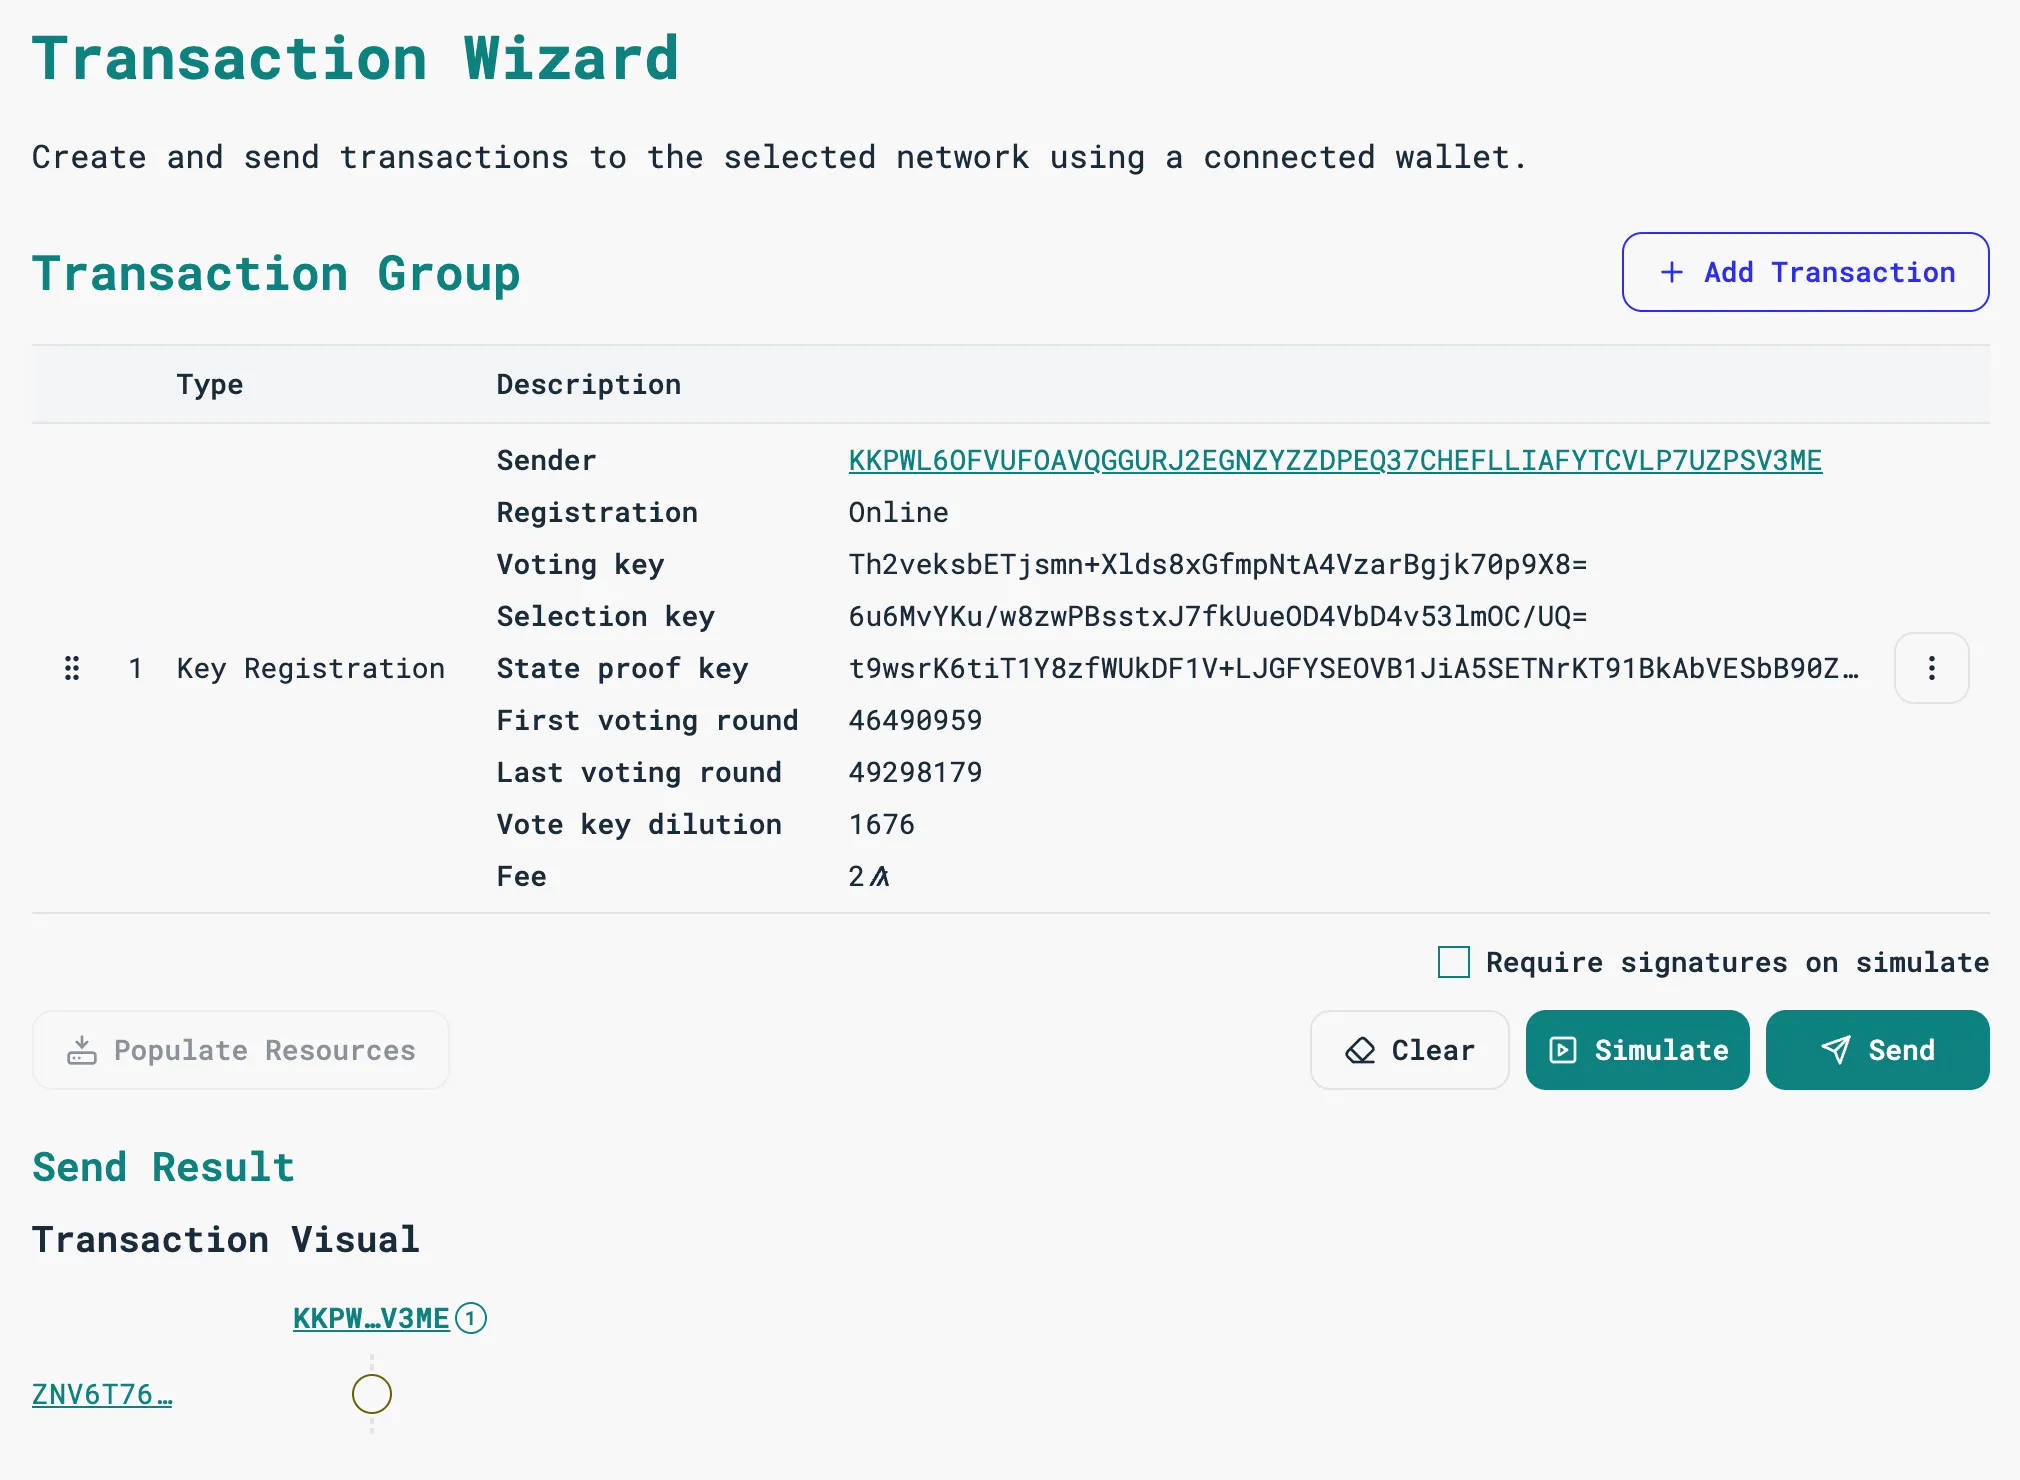
The transaction will be submitted to the network. If it is accepted, you will see a visual confirmation in Lora similar to the one displayed below:
NodeKit will detect the key registration and take you back to the Key information view:

You can press esc twice to get back to the home screen.
To confirm that your account is online, review the STATUS of your account. Accounts with an ONLINE status are participating in consensus.
That’s it! If your account balance is over 30,000 ALGO, it will accumulate rewards for each block it proposes on the Algorand network.
Navigating Accounts and Keys
If it is not running already, start nodekit with this command:
./nodekitNavigating Accounts
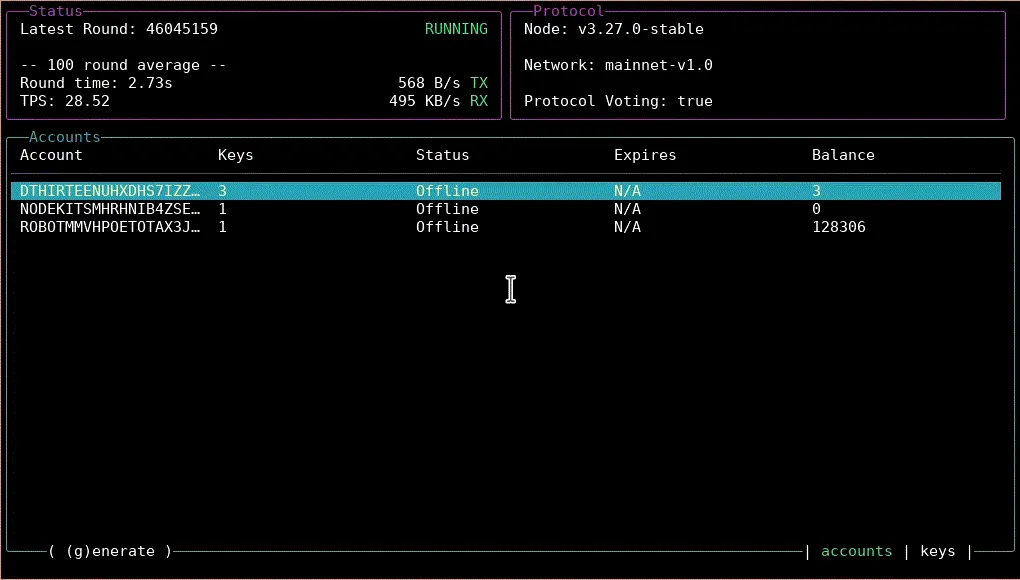
If you have participation keys for more than one account on your node, you can navigate between accounts using the up and down arrow keys.
Press enter to view the keys list of the highlighted account.
Press esc in the keys view to return to the accounts list.
Navigating Keys
If you have more than one set of participating keys for your account, you can highlight them using the up and down arrow keys.
Press enter to view the key information.
From this screen, you can press esc to return back to they keys list, D to delete a participation key, or r to register your key online or offline.
